How To Set Up Google Search Console
 It is very exciting to own your own website. When I created my first blog site, I felt so happy and excited. I wish everyone on internet can see my website and wondering how people can find my website on Google. I did a research and found that Google Search Console can help me how that! In this blog, I will show you step by step on how to set up Google Search Console.
Below is a video that give you an overview of what Google Search Console is all about.
What Is Google Search Console?
Google Search Console is another free service offered by Google. It helps website owners like you and me to monitor and maintain site’s presence in Google Search results.
Basically, Google Search Console makes sure Google find your website. It also shows you the errors Google found when reading your website’s sitemap. Then you can fix the errors to improve your site’s search performance.
The other benefit of using Google Search Console is that you can ensure that your content is correctly crawl and index by Google.
Below are other benefits of using Google Search Console.
Monitor your site’s performance in Google Search results:
- Make sure that Google can access your content
- Submit new content for crawling and remove content you don’t want shown in search results
- Create and monitor content that delivers visually engaging search results
- Maintain your site with minimal disruption to search performance
- Monitor and resolve malware or spam issues so your site stays clean
Discover how Google Search—and the world—sees your site:
- Which queries caused your site to appear in search results?
- Did some queries result in more traffic to your site than others?
- Are your product prices, company contact info, or events highlighted in rich search results?
- Which sites are linking to your website?
- Is your mobile site performing well for visitors searching on mobile?
Source: Google
How To Set Up Google Search Console?
Sign In To Google Search Console
- Goto www.google.com/webmasters
- Click on the Sign In to login with a Gmail account.
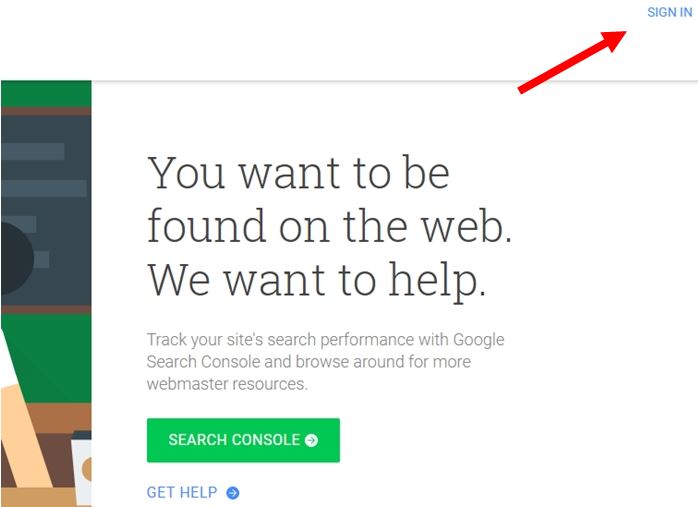
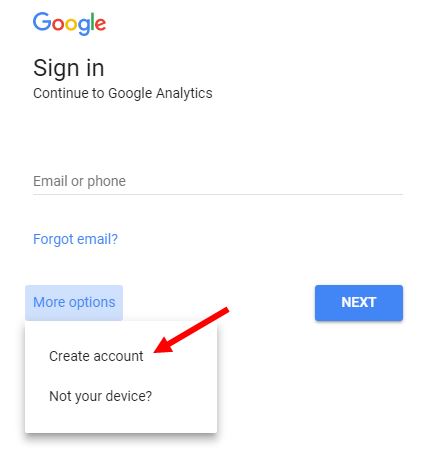
- If you do not have a Gmail account, you will be required to create one.
- Click more options and select Create account to create a Google account and then login.
Adding and Verifying Your Website
- Next, fill in your website URL in the empty field and click on ADD PROPERTY button.

- Google will now require you to verify that you own the website.
- You can do so by downloading a HTML verification file and upload to your website.
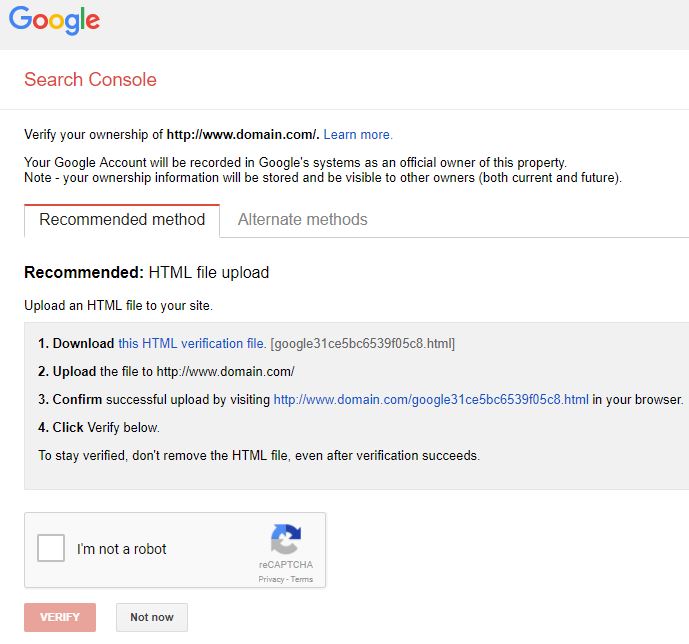
- You can upload your file via FTP or file manager.
- Alternatively, you can simply copy and paste the HTML tag which given to you under the Alternate Methods just before the closing tag.
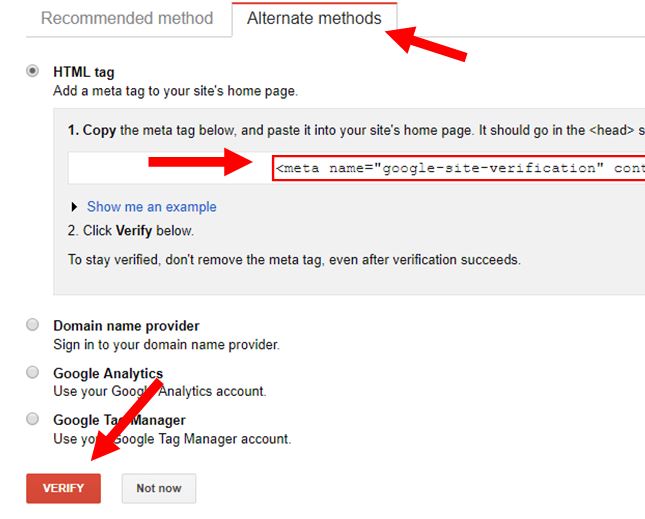
- Lastly, click the verify button to verify your website.
Adding and Verifying Another Version of Your Website
You probably know that your website link can come in 2 versions: www.yourdomain.com or yourdomain.com. In this step, you will add and verify the second version of your website. If you have added and verified your website of www.yourdomain.com, you will verify yourdomain.com in this step.
- Click on the ADD PROPERTY button and enter your website link yourdomain.com.

- You will not need to add the HTML code again because you already added it in the previous step.
- Click the verify button to verify your website.
Adding Sitemap
- In this step you will add the sitemap to both domains.
- A sitemap is a list of pages in your website which make it easy for search engine crawler to index your site.
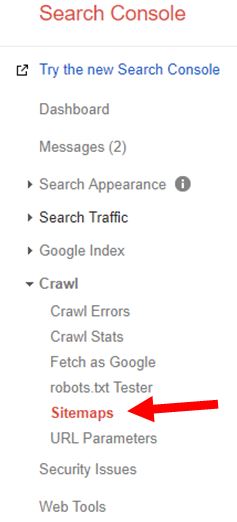
- On the side dashboard, click on Sitemaps to add the XML sitemap.
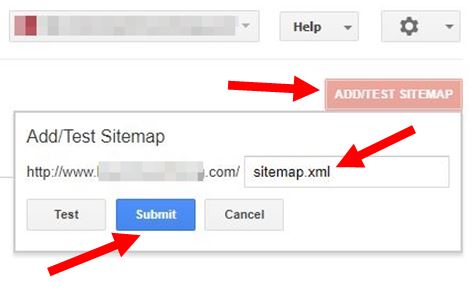
- Then click the ADD/TEST SITEMAP button.
- When adding the sitemap, add only the filename and extension not the whole URL. For example, sitemap.xml.
- Click Submit button to submit your sitemap file.
Set Preferred Domain
In this step, you will set the preferred domain. A preferred domain is how the domain will appear in search engine.
By telling Google that both WWW and non WWW domain are the same, it will make sure that Google realize that the traffic coming from both domains is actually all traffic for the same website instead of 2 separate websites.
This will help you website to appear more popular to Google helping your website ranking higher.
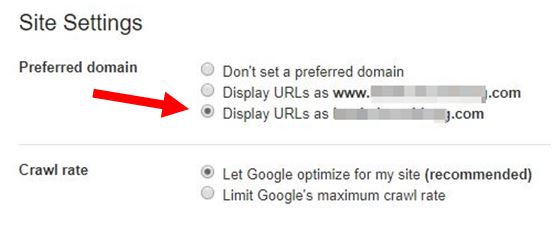
- To set the preferred domain, navigator to one your domain within search console.
- Click on the gear icon and select Site Settings.

- Then select the Preferred domain, either www.domain.com or domain.com.
Test robots.txt
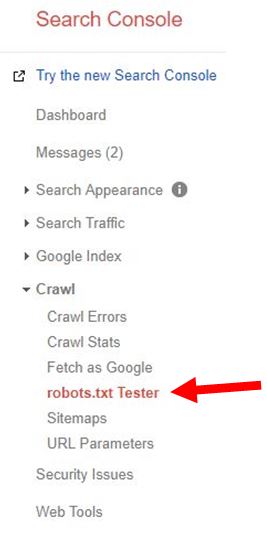
- On the side dashboard, navigate to Crawl and then robots.txt Tester.
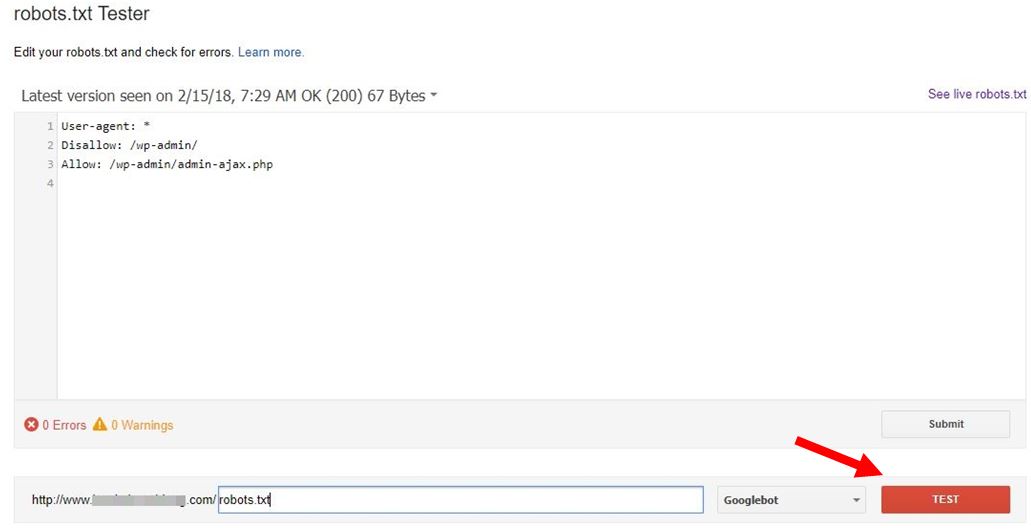
- Add in the robots.txt URL, which should be in the root folder.
- Then click Test button to make sure Google is able to crawl the website pages you want them to crawl.
Fetch As Google
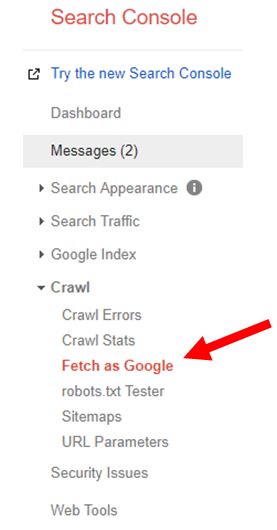
- On the side dashboard, navigate to Crawl and then Fetch as Google.
- Enter your URL and click the FETCH or FETCH AND RENDER button.
- This will tell Google to test if it can crawl the page and then return any errors that it finds.
- Click on the result to fix any errors that appear.
- Next, click the Request indexing button.

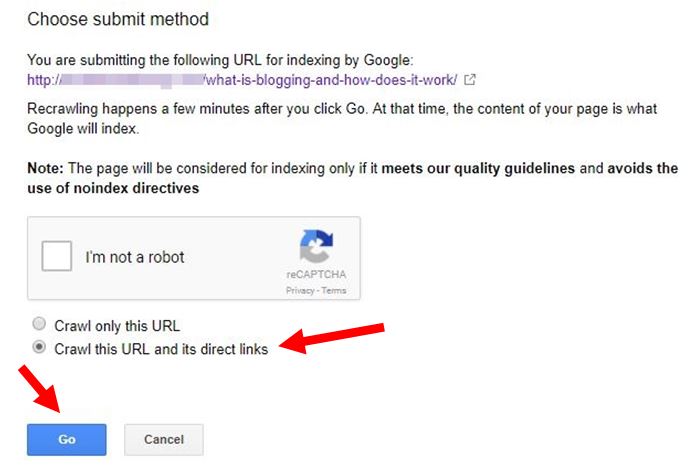
- After you click the Request indexing button, a popup window will appear.
- Select the second option Crawl this URL and its direct links and click the Go button.
Closing
Congratulation! You have now set up Google Search Console. You have successfully make sure that Google know about your website and how it structured so that it can crawl it’s all linking pages.
Thank you for reading my step by step guide on how to set up Google Search Console and I hope you found it useful. Feel free to drop me a comment below if you have any question about setting up Google Search Console.
To Your Success,
Kwah Choon Hiong


